Organizing your Photos with Albums
Let’s see a show of hands. How many of you have browsed through hundreds of pictures looking for a specific family picture that you wanted to show.
At that point, you say, I have to organize my pictures so that I can find the photos I’m seeking.
The primary way to organize photos in the Photos app is to create and place photos into albums.
This recipe will show you how to create albums and add photos to your albums.
Default Albums
The Photos app has a number of preset default albums that you can see by tapping the Albums icon at the bottom of the Photos app screen.

Default Albums
The default albums include:
- All Photos (tap Library to view
- Recents
- Favorites (We’ve published a Nugget about Favorites as Create a Brag Book with Photo Favorites)
- People
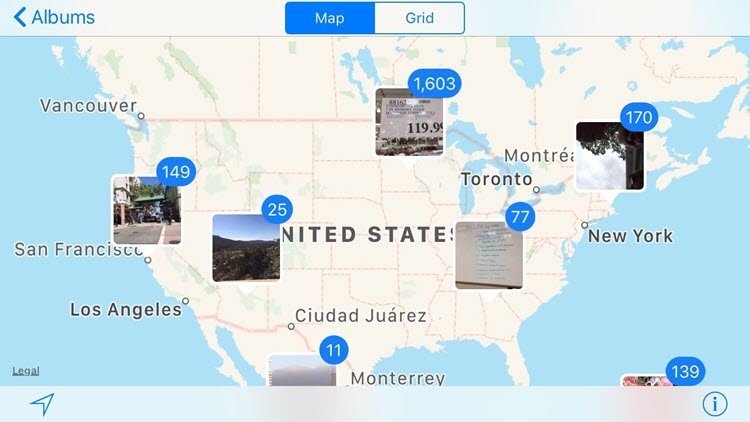
- Places
- Individual albums for different Media Types of photos like video, selfies, Slo-mo and more.
- Deleted Photos (Allows you to retrieve photos that you accidently delete)
A key element of organizing hundreds or even thousands of photos you have taken is to create additional albums. When you take photos while on vacation, you can create a custom album to organize that group of photos. You might have albums dedicated to family events or specific subjects. You might create albums to share a special set of photos you have taken.
Photo Storage – Just One Physical Copy of the Photo
When you take a photo with the Camera app will create one photo stored on your iPhone in the All Photos album. If you have not implemented iCloud photo sharing, the primary album is called Camera Roll. That same photo will also be placed in the Recents album. Additionally, you can place that photo into other albums.
When you add that photo to another album, the Photos app does NOT create another copy of the image. Albums are virtual lists of photos and use no additional space no matter how many albums a photo is placed in. Photos can be linked to multiple albums.
Create a New Album
Launch the Photos app.
Tap on the Albums icon.
Tap ![]() to create/add a new Album
to create/add a new Album
Indicate what you want to create.
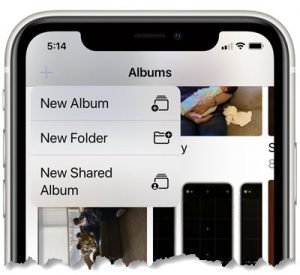
The choices are:
New Album – organize your photos
New Folder – organize your albums
New Shared Album – share organized photos.
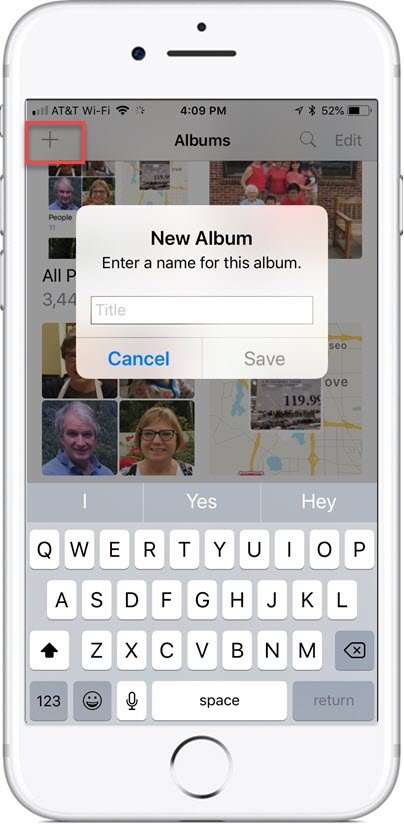
Tap New Album.
Enter an album name.
Tap Save to create the album.
After tapping Save, you are given an opportunity to Select pictures for the new Album. The process will take you your collections of photos where you can select photos by location or date. Tap the photos you wish to add to the new album and tap Done
Adding Photos to an Album
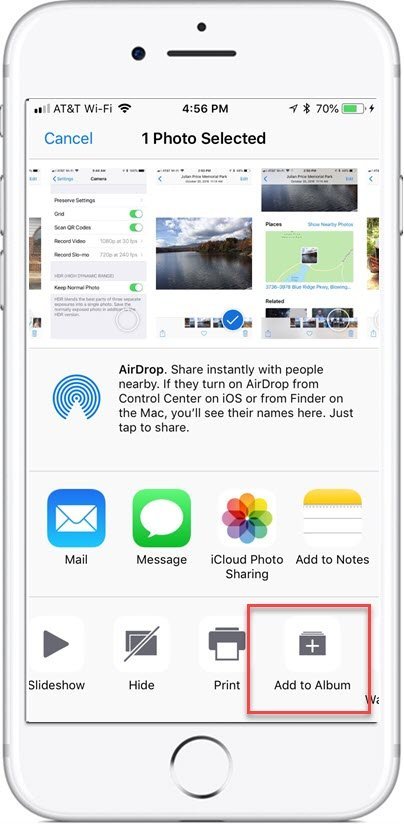
Launch the Photos app and display any single photo.
Tap the Share icon. ![]()
Scroll down your Share options.
Optionally, you can place a check mark on additional photos to add to the album. Swipe left or right to view the photos and tap the photo to add a check mark.

Tap Add to Album.
Scroll to find the desired Album and tap. Notice the cute animation that depicts the photo moving to the folder.
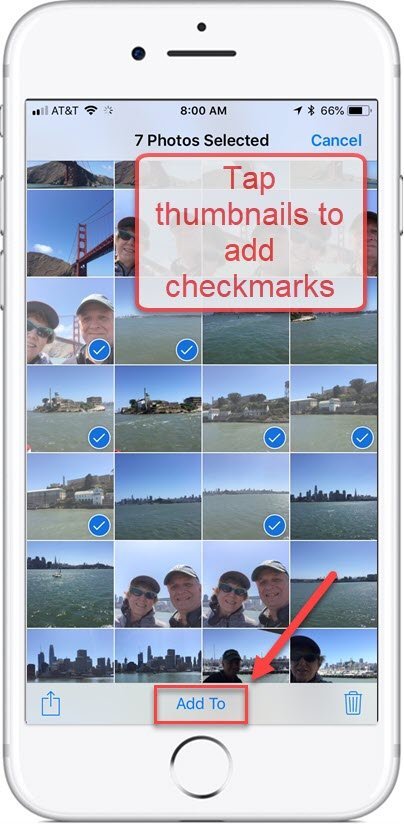
Batch Select & Add to Album
Launch the Photos app.
Tap Albums on the bottom to view your album collection.
Tap an Album to view photo thumbnails in any Album
Tap Select (upper right corner)
Tap individual thumbnails to place a check mark by the photo.
Continue to tap thumbnails to add checkmarks.
Tap the Share icon.
Tap on Add to Album
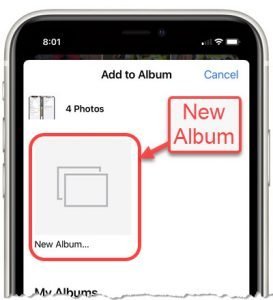
Browse the Albums and tap the Album you wish to include the photos you have checked. Notice your screen shows the number of photos that will be added to the album for confirmation.
You can also create a new Album with this process. Instead of selecting an existing album, tap New Album and provide a album name.
 Smart Tip: Ideas for Albums
Here are a few ideas about using albums to organize your photos:
Brag Book – Use the Favorites album to create your brag book of photos you want to keep handy for showing friends and family
Reference Album – Consider taking photos of the important information in your life and adding those photos to a dedicated reference album. For example, take pictures of license plates, insurance cards, membership cards, etc and store in a Reference Album.
Project Album – Involved in a home project? Consider creating albums to organize the photos your take showing progress on the project.
Organize Albums with Folders
If you anticipate creating many albums, you can organize your albums with folders. For example, if you want to create albums to organize all of the photos you take during vacations, you could create a folder called Vacations and then create albums under that folder name for all of your vacations, e.g. Boston 2017, California 2018, Italy 2015, etc. This process of creating a folder is quite hidden and also not documented in the IOS User manual. Tip: If you are using an iPhone or iPad to organize your album, you will need to create your folders before you create the albums in the folder. The IOS Photos app provides no method to drag an existing album into a folder. However, if you are using the Photos app on a Mac computer or laptop, you can drag an existing album into an existing folder allowing you to organize your albums into folders after your have created your albums. Here are the steps to create a folder:
- Open the Photos app
- Tap Albums

- Press and Hold + (plus) to add a new folder or album.
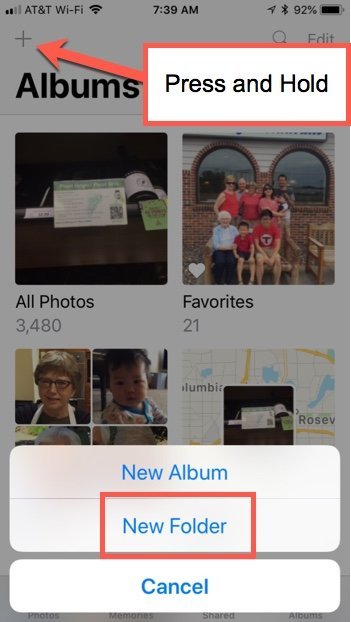
- Tap New folder
- Give the folder a name.
- Tap Save
Create an Album in a Folder.
After creating a folder create an album within that folder with the following steps:
- In the Photos app, tap the name of the folder where you want to add the album.
- Tap Edit in the upper right corner.

- Tap + Plus to add a new folder.

- Type the name of the new album and tap Save
- The album is created.
Add photos to this album as you would any other album
Delete a Photo from an Album
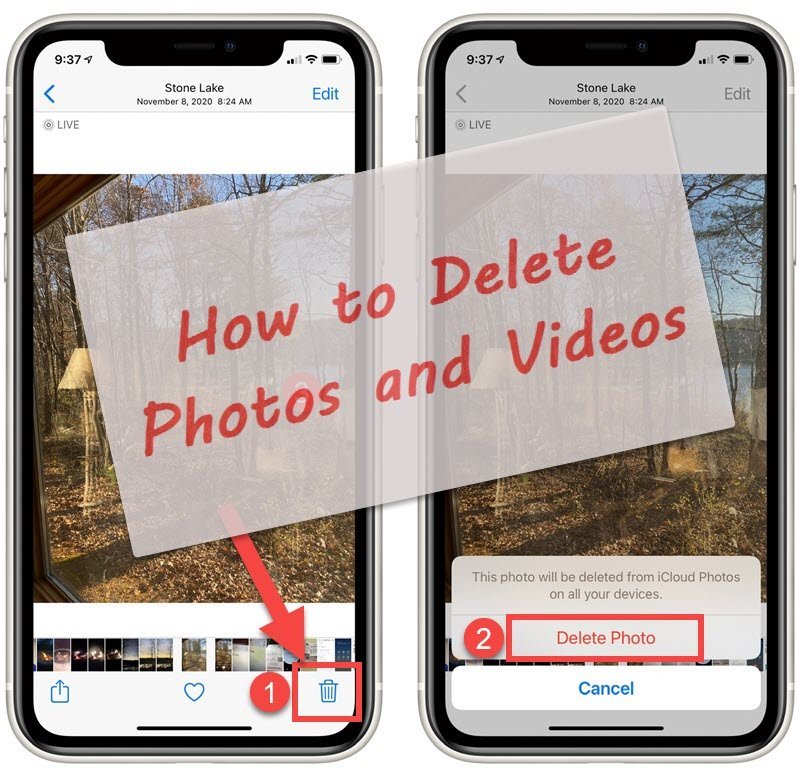
When you wish to delete a photo from an Album, you tap the same Delete icon ![]() as you type when you wish to physically delete a photo. However, when you start the delete action from a photo in an album, you are presented with two choices:
as you type when you wish to physically delete a photo. However, when you start the delete action from a photo in an album, you are presented with two choices:
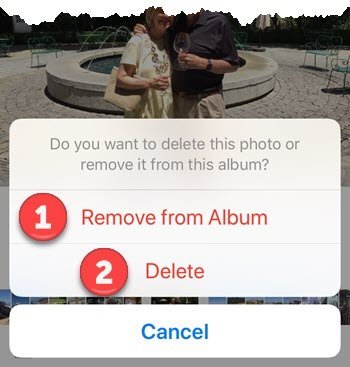
Tap Delete to remove photo from Album
- Remove from Album – Keeps the photo but removes from album.
- Delete – Physically deletes the photo from your devices and storage.
Summary
Albums are the primary method that iPhone photographers use to organize their photo collection. Consider creating albums for events, vacations and custom collections of photos you with to keep.
Check for Understanding
Use the following questions to determine if you need to read or study this recipe. You might already have an understanding of this topic. Following your study, answer the same questions to help you check your understanding of the skills taught in this lesson.
- Do you find yourself browsing hundreds of photos looking for one particular photo?
- Can you create an album and add photo to the album?
- Do you know how to remove a photo from an album?
- Can you store a photo in more than one album?
Additional Information
The Senior Tech Club recommends the following additional resources for members that wish to pursue additional and/or advanced information on this recipe:
Senior Tech Club Recipes and Nuggets on the Camera and Photos apps:
.









0 Comments