A Tour of the Camera App – Older iPhones
A great many iPhone users will use their iPhone cameras in a point and shoot fashion. They will pull out their camera, aim at their subject and press the shutter button to snap the photo.
With later iPhone models, the iPhone’s camera has included modes and features that take it into new territory. If you are only doing point and shoot, you may be missing some great photo opportunities.
The purpose of this Nugget is to take you on a tour of the Camera app and identify its core capabilities to take you beyond point and shoot.
A Tour of the Camera App
In order to take better pictures and take advantage of the primary capabilities of the iPhone came, let’s take a tour of the Camera app and it’s functions.
If you launch the iPhone, you will see the following elements on the screen in this step-by-step:
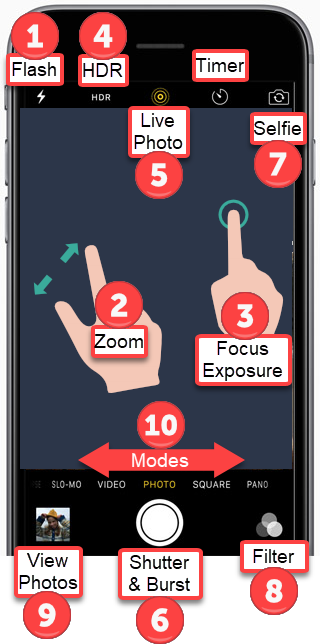
Step-by-Step description of the Camera App
1 Flash
If picture needs flash, the iPhone’s built in flash can add necessary light to a subject. Manage the Flash by pressing the Flash (lightning bolt) icon in the camera app.
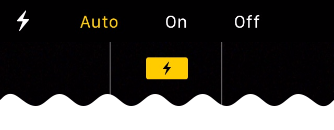
Control the Flash
The Flash function provides three settings:
- Auto – the Camera app will use the flash when warranted by light conditions.
- On – the Camera app will always use flash
- Off – the Camera app will not use flash.
 Senior Smart Tip: Flash not always needed
Those of us who learned about cameras in the Kodak era, recognize a rule that says that indoor pictures always required a flash. The iPhone camera is actually good in low light situations and the rule doesn’t always need to apply. In general, your photos are better without flash. Try the photo before you turn on the flash.
2 Zoom
The basic zoom function that is available in all iPhones is a digital zoom versus an optical zoom that comes with zoom lenses. Digital zoom is often disparaged because it lowers the image resolution of your picture and tends to expose flaws. Regardless, most people consider using the digital zoom because they want the image to appear closer. However, if given a choice you should move closer to your subject and take the picture without zoom.
The iPhone 7 Plus, 8 Plus and iPhone X have a dual lens that provides a 2x’s optical zoom
3 Focus and Exposure
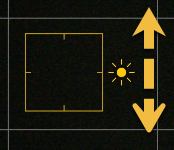
Use the slider to control the exposure (lighting)
The Focus and Exposure of your iPhone camera is usually managed by your iPhone. It generally does a good job. However you can manually set the focus and exposure by simply tapping on the spot on the screen that you wish to have the focus. For example, if you subject includes items in the foreground and background, tap the area of the screen that you consider to be your primary focus.
When you tap, you will get a slider on the screen (look for the sun) that allows you to change the exposure bias. You will see the image get lighter or darker.
AE/AF Lock – When you press and hold on the subject on the screen, you will lock the exposure and focus. This is particularly useful if you want to take multiple photos with the same exposure and focus. When locked, you will see an AE/AF (automatic exposure/automatic focus) Lock on the screen.

Press and Hold to get AE/AF Lock.
Tap another location on the screen to remove the lock.
4 HDR (High Dynamic Range)
In HDR mode, the Camera app takes multiple photos in rapid succession, at different exposure settings—and blends them together. The resulting photo has better detail in the bright and midtone areas. A good candidate for HDR is where the picture has both light and dark areas.
Tap the HDR button and you are presented with three HDR options, Auto, On and Off.
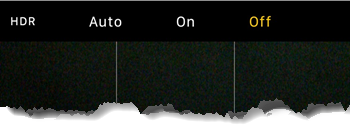
Control HDR
Because the shot takes longer, keep the iPhone steady and avoid subject motion. Or you can use a tripod to keep the phone steady.
5 Live Photo
The camera records with video what happens just before and after you take your photo, along with the audio. The result is a moving picture. Live Photos are available in iPhone 6s and later.

Live photos are either on (yellow) or off (white)
6 Selfie (Front or Rear-facing Camera)
Switch between front and back-facing cameras. Switch the camera to take a selfie with you or a group. Tip: Often it is easier to use the volume buttons to release the shutter when you are holding the phone like this.
7 Filters
Add a filter to add a special effect to a picture. A prime example is the mono filter which will take the picture as a black and white image. You can also add filters after the photo is taken in the Photos app.
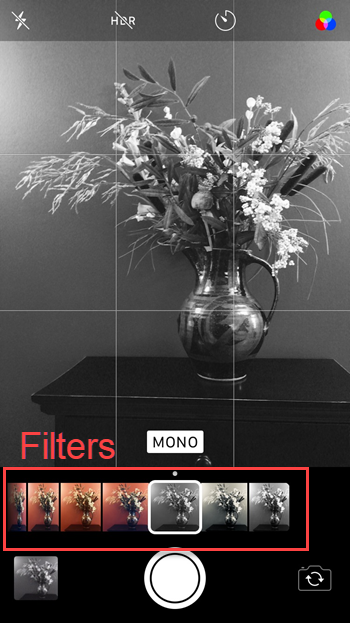
Select a Filter like MONO for black and white pictures
8 View Photos
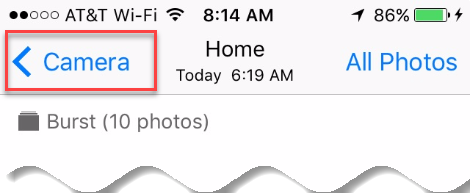
Tap Camera to return to the Camera App after viewing photos
Tap to view your most recent photos and other in the Photos app. After viewing your photos, tap Camera to return to the Camera app.
9 Modes
Your iPhone Camera has several photo modes, allowing you to shoot still, video, panoramic or more. Here are definitions and essential tips for each mode:
- Photo – Use to take traditional still photos.
- Portrait – Available on iPhone 7 Plus, 8 Plus and X models to achieve a depth of field effect for portraits, e.g. clear face, blurry background.
- Square – Provides the framing and image preferred for social media platforms like Instagram.
- Pano(ramic) – Use Pano to capture a wide angle photo that won’t fit on a single camera screen.
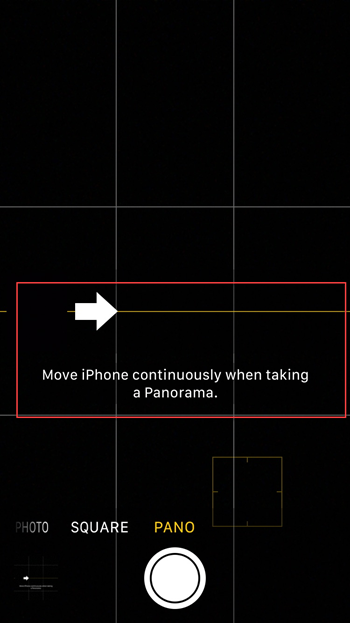
On screen instruction to Pano Mode
Pano Instruction: Tap shutter, Move camera in the direction of the arrow. Tap shutter to end.

Pano Sample – Boston Harbor taken by Don
- Video – Shoot high quality movies with your iPhone.
Video Instruction: Tap the shutter to start recording. Tap again to end the video. Note how the shutter button is red for video.
- Time-lapse – Create time lapse video of activities or events where you want to record progress.
Time-lapse Instruction: Tap the shutter to start and end. Prop your phone in stationary position or use a tripod.
- Slo-mo Take video that you play back in slow motion. Great for special effects or capturing a fast activity.
Step-by-Step
Additional Information
The Senior Tech Club recommends the following additional resources for members that wish to pursue additional and/or advanced information on this recipe:
Senior Tech Club Recipes and Nuggets on the Camera and Photos apps:
.


