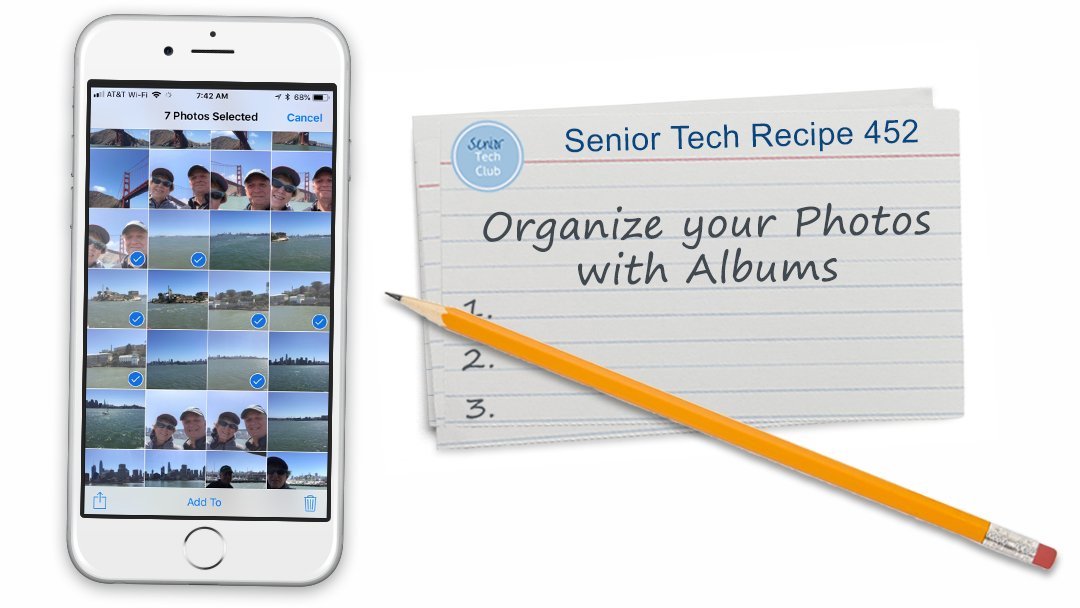
Organizing your Photos with Albums
Let’s see a show of hands. How many of you have browsed through hundreds of pictures looking for a specific family picture that you wanted to show?
At that point, you say, I have to organize my pictures so that I can find the photos I’m seeking.
The primary way to organize photos in the Photos app is to create and place photos into albums.
This Nugget will show you the basics on how to create albums and add photos to your albums.
Access Albums
Launch the Photos app and tap the Albums icon at the bottom of the screen.

Album Collection in the Photos app
Here is a review of what you will find under Albums.
Default Albums
The Photos app has a number of preset default albums that are already set up for you.
that you can see by tapping the Albums icon at the bottom of the Photos app screen.
The default albums include:
- All Photos or Camera Roll (if iCloud Photo Library is not activated)
- Favorites
- People & Places
- Media Types – Individual albums for different types of photos like video, selfies, Slo-mo and more.
- Other Albums
- Hidden
- Recently Deleted (Allows you to retrieve photos that you accidentally deleted)
My Albums
You can create additional albums to organize the photos in your life. You might have albums dedicated to vacations or family events. You might create albums to share a special set of photos you have taken.
Album Storage
When you take a photo with the Camera app will create one photo stored on your iPhone in the All Photos album. If you have not implemented iCloud photo sharing, the primary album is called Camera Roll.
When you add that photo to another album, the Photos app does NOT create another copy of the image. Nor does it remove that photo from the All Photos album.
The Albums in My Albums are virtual lists of photos that use no additional space no matter how many albums a photo is placed in. Photos can be linked to multiple albums.
Step-by-Step
Create a new album
Launch the Photos app.
Tap on the Albums icon.
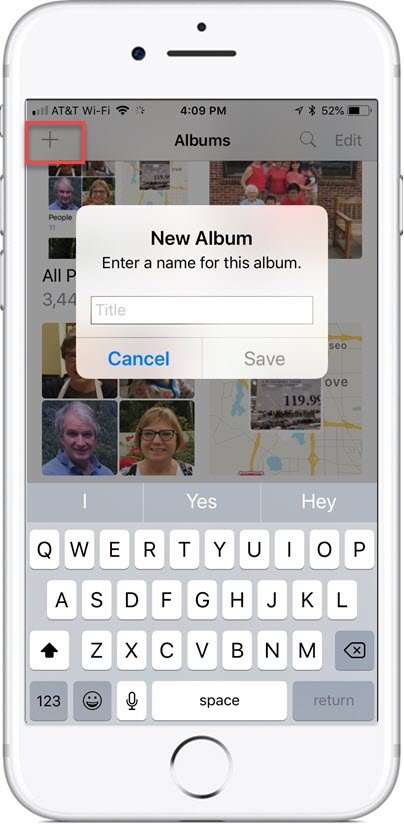
Tap ![]() to create/add a new Album
to create/add a new Album
Enter an album name.
Tap Save to create the album.
After tapping Save, you are given an opportunity to Select pictures for the new Album. The process will take you your collections of photos where you can select photos by location or date. Tap the photos you wish to add to the new album and tap Done
Adding Photos to an Album
There are two primary methods for adding photos to an album:
- Individual photos – one at a time.
- Batch select – select a group of photos
Individual Photos
Launch the Photos app and display any photo.
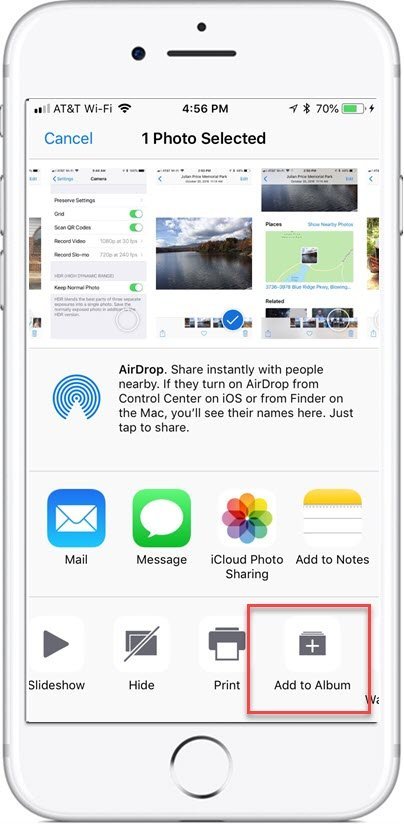
Tap the Share icon. ![]()
Scroll right on the bottom row of Share icons.
Tap Add to Album.
Scroll to find the desired Album and tap. Notice the cute animation that depicts the photo moving to the folder.
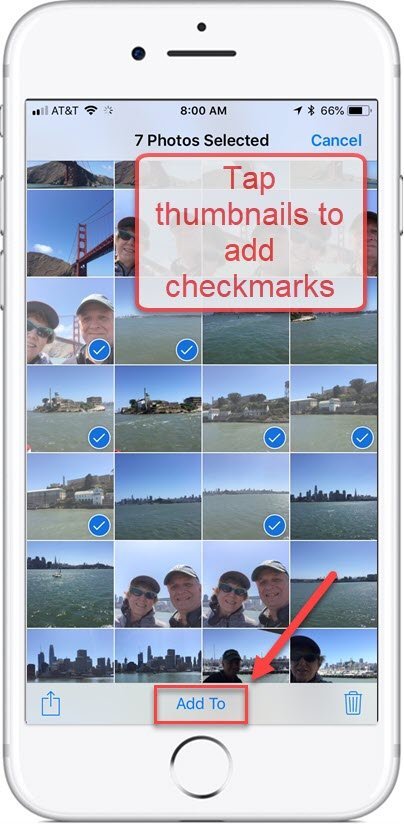
Batch Select & Add to Album
Launch the Photos app.
View photo thumbnails in any Album or Collection.
Tap Select
Tap individual thumbnails to place a check mark by the photo.
Continue to tap thumbnails to add checkmarks.
Tap on Add to.
Browse the Albums and tap the Album you wish to include the photos you have checked. Notice your screen shows the number of photos that will be added to the album for confirmation.
Additional Information
The Senior Tech Club recommends the following additional resources for members that wish to pursue additional and/or advanced information on this recipe:
Senior Tech Club Recipes and Nuggets on the Camera and Photos apps:
.


