How to Take a Screenshot on your iPhone
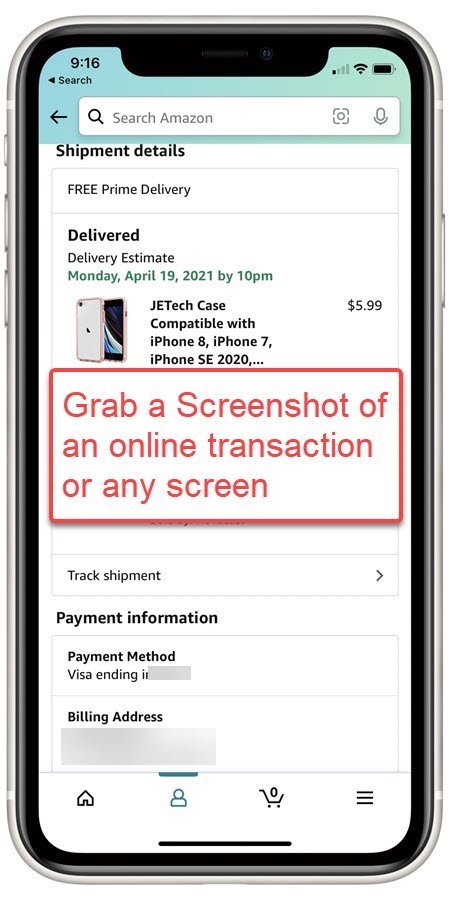
You may occasionally need to capture a screenshot on your iPhone. A screenshot means you wish to take a photo of whatever is displayed on your screen. Here are some reasons for taking a screenshot:
- Preserve a special text message.
- You discover a great piece of information browsing the web in Safari and you wish to capture the content in a photo.
- You need to quickly document a completed shopping transaction.
In all of this cases and more, you can capture a screenshot and retrieve the photo from your Photo Library using the Photos app.

Which model of iPhone do you use?
The method for taking a screenshot will vary depending on the model of iPhone that you use. We will break this down as:
- iPhones with a Home button. This includes iPhone 8 and earlier and the iPhone SE.
- iPhones without a Home button. This includes iPhone X, 11, 12 and later. This will generally be newer models.
Check out the Step-by-Step instructions for these two variations.
Screenshots on an iPhone with a Home Button
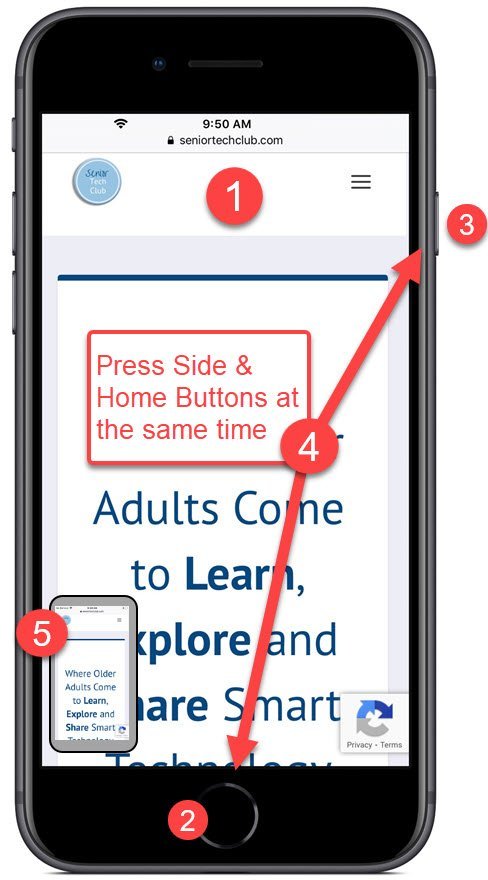
Take a screenshot on an iPhone with a Home button with the following steps.
1 Display the information that you with to capture in the screen shot. This can be in any app or screen that the iPhone displays.
2 Locate your Home Button below your screen.
3 Locate the Side Button (also known as the Sleep/Wake button) usually on the right edge of your iPhone. Older iPhones and iPad may have this button on the top of your phone. It is the button that you use to put your iPhone to sleep.
4 Simultaneously press the Side (Sleep/Wake) Button and the Home button at the same time and immediately release them. This dual button action takes a little practice so don’t be afraid to practice on a few throwaway shots as you learn.
5 You will see a small thumbnail of the screenshot image appear in the lower right corner of the screen. This confirms that the screen shot was taken.

Screenshots on an iPhone without a Home Button
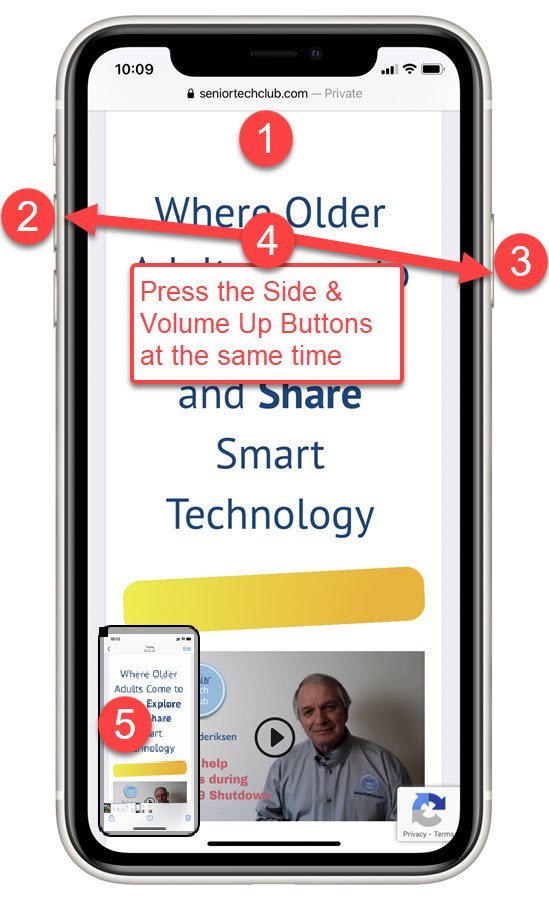
Take a screenshot on an iPhone without a Home button with the following steps. These are iPhone like the iPhone X, 11, 12 and later.
1 Display the information that you with to capture in the screen shot. This can be in any app or screen that the iPhone displays.
2 Locate your Volume Up Button on the left side of your iPhone
3 Locate the Side Button (also known as the Sleep/Wake button) usually on the right edge of your iPhone.
4 Simultaneously press the Side (Sleep/Wake) Button and the Volume Up button at the same time and immediately release them. This dual button action takes a little practice so don’t be afraid to practice on a few throwaway shots as you learn.
5 You will see a small thumbnail of the screenshot image appear in the lower right corner of the screen. This confirms that the screen shot was taken.

Modify the Screenshot
The thumbnail on the lower left corner of the screen as described in 5 above will disappear in a few seconds. If you tap it before it disappears, you can edit or crop your screenshot. See Crop & Edit Photos with the Photos App for more information.
Retrieve your Screenshot
After the thumbnail disappears, you can find your screenshot in the Photos app. Tap Albums> Recents to locate it after taking the screenshot.
You can find all of your screenshot but tapping on Albums and scrolling down to Media Types >Screenshots.

From the Photos app, you can display the screenshhot and tap Share to send the photo to with AirDrop, Messages or Mail. It is like any other photo in the Photo Library.
If you are using the iCloud Photo Library, you can also retrieve the photo by logging into iCloud.com with your AppleID. This screenshot is like any other Photo in the Photo Library.
Summary
Use a screenshot to take a photo of any screen on your iPhone. Then retrieve the screenshot from the Recents album in the Photos app or use the Media Types>Screenshots album to see all of your screenshots.

